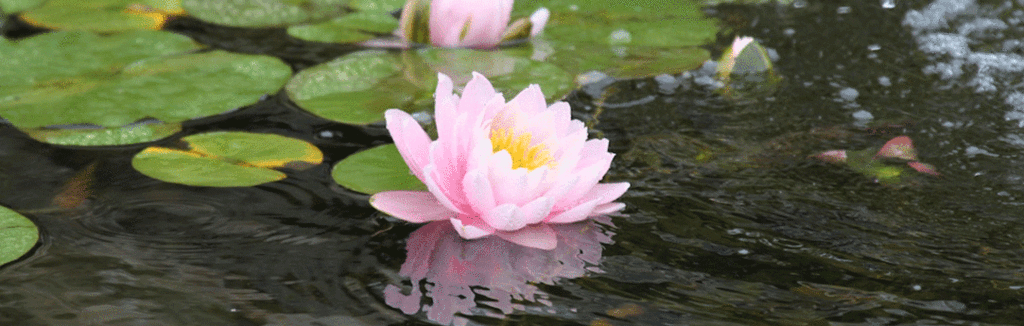
Spring is upon us, and with the rising temperatures it’s time for your garden to come alive. With plants budding and trees spreading their leaves, what better time to add to the beauty and vibrancy of your garden by building a pond? A pond is a great opportunity to attract more wildlife to your garden and the gentle light, movement and sound it generates can create an oasis of tranquility in an otherwise busy world.
But setting up a pond can be a daunting task, so here is a helpful guide to guide you through setting up your own pond:
1) What is the purpose of your pond?
Do you just want to keep plants in your pond, or do you want to stock it with fish as well? If you would like to stock fish you should ensure your pond has a depth of at least 3ft or 90cm for larger fish such as koi – or 45cm for smaller fish like goldfish.
2) Choose the site carefully.
The first thing you should do is choose the right location – this is of critical importance in creating that perfect atmosphere in your garden. Choose a site that gets a lot of sunlight, your pond plants will thank you later. If possible, also try to avoid an area with lots of overhanging deciduous trees, as the leaves falling in autumn will leave you with a big job clearing them from the surface of the pond. If this is unavoidable, however, you could always invest in some pond netting to make this job far easier and prevent falling leaves from polluting your pond. While it can be great to have the pond as a centrepiece, to be good to frogs and other amphibious future denizens of your pond, it is advisable to have the shallow side of your pond up against, or near some cover. And of course, make sure the area you want for your pond is excavatable, and does not have any pipes or concrete running through it.
3) Installing a pond with a rigid liner.
Stand the liner in the position you have decided upon and then mark the ground around with something. (Spray Paint is best for this, but sand or rope can work as well too.) Then mark again about 30 cm out from this, you’ll want to excavate an area larger than the pond itself if you want the plastic mould to fit. Dig the whole area out to the level of the shallowest part of your pond, plus a couple of extra inches. Then you’ll need to mark out the next shallowest areas of your pond, and dig again. Repeat until you have the correct space for your mold, it is good while doing to to ensure each “step” of your pond is level using a plank of wood and a spirit level.
At this point you might want to remove and protruding sticks or stones and fill in a layer of sand or pond underlay to stop any stones scratching your preformed pond ensuring it last as long as possible.
Once the excavation is complete and you have your underlay, stand the rigid liner upon it and slowly add water to the pond from a hosepipe, while filling in any gaps between the edge of the pond with soil or sand.
3) Installing a pond with flexible liner.
Once again you’ll want to start by measuring out the area you want your pond to fill. Again you can do this with a rope or spray paint. To find out how much pond liner you’ll need for your pond, you can use the following formula:-
Length = max length + (2 x max depth) + 1 (for overlap)
Width= max width + (2 x max depth) + 1 (for overlap)
So for a pond with a width of 3m, a length of 10m and a depth of 1m, you’ll need 13m x 6m Pond Liner.
Using a flexible liner gives you a lot more freedom as to how you want to shape your pond, but it is still best to ensure that the shelves or steps of your pond are level and to have a gradient down from each step that is steep but not vertical, using the same technique as above for each level of your pond.
Once you have dug out the area you want your pond to fill, and layered it with sand or pond underlay, it’s time to actually install your pond liner. Preferably on a warm day, lay it down over the area you have excavated. Weigh down the edges with stones and slowly fill the area with water – tugging at the edges to prevent creasing. Once it is filled to about 2-3 inches from the rim of the pond, leave for 24 hours to let the pond settle. Then trim the excess liner around the edge to around 6in from the rim.
4) Edging your pond.
Whether you’ve gone for a flexible or rigid liner, the next step is to create your edging. What kind of edging you want for your pond depends upon the type of pond you want to create, rough stones and boulders for that rustic feel, or paving slabs and cement for a more formal look. What’s essential is that you cover up those unsightly edges of pond liner, and ensure your liner is held firmly in place. If people are going to be routinely walking around the edges of your pond, mortaring it securely in places may be required.
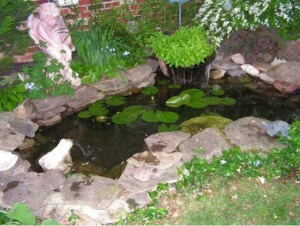
And there you have it, a pond in your garden. Of course, it’s little more than an oversized paddling pool at the moment, without any pond plants or fish. Next week we’ll show you how to make your pond come to life. Stay tuned!
Don’t forget, here at Primrose we have a variety of products to help you realise the pond of your dreams:
Pond Liner
Thick and sturdy, here at Primrose only sell quality Pond Liner, with a guarantee of 10 years so that you can rest easy beside your garden oasis. We also sell underliner and joining tape, so you’ll have everything you need.
Preformed Ponds
Primrose also supply a large range of preformed ponds. This can be a slightly easier option as you won’t have to measure out all that pond liner and underlay. Our preformed ponds come with multi-layering, so you can have different depths for your pond – important as different aquatic plants thrive at various depths. A great way to get your pond life started!
Decorative Pebbles and Aggregates
Perfect to help create the finish touches to your pond, especially the edging.
Water Features for your Pond
From floating lily fountains to blade cascades, the sound of running water can really add something to your pond or watercourse.
Make your pond come alive – even at night!
Pond in a Pot
One of the innovations we’re most proud of here at Primrose is the Pond in a Pot. Perfect if you don’t have the space or the time to set up a regular pond, our Pond in a Pot kits come with everything you need to set up a pond in your garden, or even your balcony or patio.
 Charlie works in the Primrose marketing team, mainly on online marketing.
When not writing for the Primrose Blog, Charlie likes nothing more than a good book and a cool cider.
To see the rest of Charlie’s posts, click here.